In this tutorial, you will learn what is Git and GitHub and how to use them in the real-world web development projects.
so, let’s get started…
What is GIT?
GIT is a Distributed Version Control tool used for source code management.
GIT was initially designed and developed by Linus Torvalds for Linux Kernel development.
What is Version Control System(VCS)?
Version Control System is a software that helps software developers to work together and maintain a complete history of theory work.
So GitHub is a tool that allows multiple developers to collaborate on the same project code so, all the developers have the entire copy of the latest code on their local system. if any developer made any changes to code then the latest code will also re-distributed to all developers.
- Git is used to tracking changes in the source code
- Git Allow multiple developers to work together
- Git Has the ability to handle the large project efficiently
- By using git you can know Who made what changes and when
- and last but not least you can Revert back at any time
CONCEPTS OF GIT
- Keep track of code history
- Takes “snapshots” of your files
- You decide when to take a snapshot by making “commit”
- You can visit any snapshot at any time
- You can stage files before committing
What is GitHub?
GitHub is a code hosting platform for version control and collaboration.
So GitHub is a Remote Server for source code management. It lets you and others work together on projects from anywhere and also provides a graphical interface to manage local repository code
Read, Understanding Git Branching Step by Step Guide
Step 1: Download and install Git
Go to Git's official page or click here and download and install it on your machine.

Step 2: Create a Repository
Open Git Bash command Tool from your machine.
Create a “git-demo” folder
mkdir git-demo
Then Move to the “git-demo” folder
cd git-demo
Now Create a new Git instance for your project
git init
Now you will able to see a hidden folder named .git inside the “git-demo” folder
Create a file called demo.text in the git-demo folder and put some text into it.
Check the status of the repository to find out if there have been new changes by typing git status command in terminal
git status
It will show the newly added files list with red color with untracked files label.
Step 3: Commit changes to Git
Add the file you just created to the files you would like to commit the change.
git add demo.txt
Let’s commit those changes to the repository
git commit -m "New file added"
Step 4: Signup to GitHub and Creating a Repository
A repository is a storage space where your project lives. It can be local to a folder on your computer, or it can be a storage space on GitHub.
You can keep code files, text files, images or any kind of a file in a repository. You need a GitHub repository when you have done some changes and are ready to be uploaded. This GitHub repository acts as your remote repository.
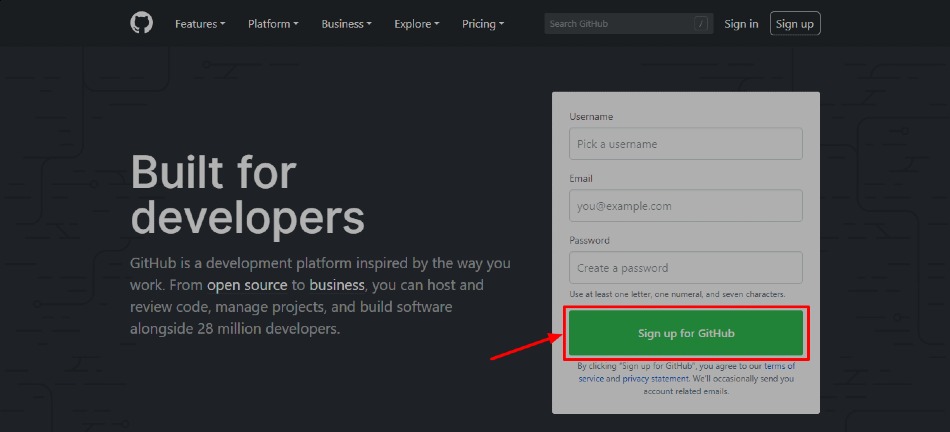
Now go to the link: https://github.com. Fill out the signup form and click on “Sign up for Github”.

Then click on start new project

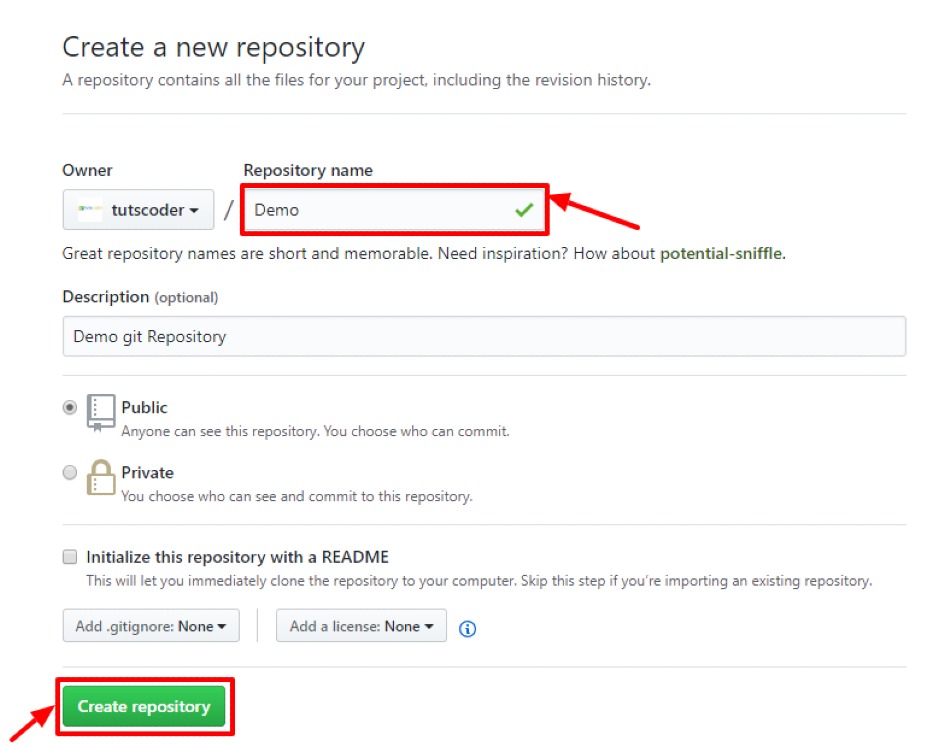
Enter any repository name and click on “Create Repository”. You can also give a description to your repository (optional).

Now you have created a new blank repository for your GitHub project
Step 5: Add your GitHub username to your Git Configuration
git config --global user.name <your github username>

git config --global user.email <your github email>
Step 6: Connect local and remote repository and push changes
Connect your local repository to your remote repository
git remote add origin <your repo url>
Push your files to the remote repository by typing the git push command
git push origin master
Congratulations, now you have done your first push on your remote repository, Take a look at your GitHub profile and you’ll see your new commits
Here’s what you accomplished in this tutorial:
- What are Git and GitHub
- Setup Git and GitHub on your machine
- GitHub Created an open-source repository
- Changed a file and committed those changes to GitHub
- Pushed local repository changes to the remote repository
Conclusion
Thanks for reading.
Do let me know If you face any difficulties please feel free to comment below we love to help you. if you have any feedback suggestions then please inform us by commenting.
Don’t forget to share this tutorial with your friends on facebook and twitter.


Leave a Comment
Share Your Thoughts