
In this tutorial, we will learn how to deploy the nodejs application on Heroku.
so, let's get started...
Assuming you have node.js installed on your machine, if not then Click here else follow the below steps:
If you prefer watching a video..
Be sure to Subscribe to the Official TutsCoder Youtube Channel for more videos.
Also read, Top 10+ Heroku Alternatives For Free
How to Deploy Node Express App on Heroku step by step:
Creating nodejs application:
Create a project directory and cd into it.
mkdir nodejs-heroku
cd nodejs-heroku
Initialize project. This command will create a package.json inside the project root directory.
npm initNow run the below command to install express.
npm i expressNow create an index.js file and add the below code.
const express = require('express')
const app = express()
const port = process.env.PORT || 4000

app.get('/', (req, res) => {
  res.send('Hello World!')
})

app.listen(port, () => {
  console.log(`App listening on Port:${port}`)
})
The above code will run a server that will display "Hello World" when we visit it in the browser.
Open the "package.json" file and you will see the “scripts” key.
"scripts": { "test": "echo \"Error: no test specified\" && exit 1" },Replace it with:
"scripts": {"start": "node index.js"},Now you can test this application locally by running
npm startNow visit http://localhost:4000/ to see the result.
Git Setup
Now execute the below commands one by one to install the git repository and make the first commit.
git init // will intialize git into current repo
git add .
git commit -m "first commit"
Push to GitHub
Go to https://github.com/ and log in.
Create a new repository.
Copy the line I highlighted in the above image
git remote add origin <your-git-remote-url>Paste it in cmd and press enter.
Now push the code to GitHub.
git push origin masterAfter successfully executing the above command, refresh the GitHub page and you will see that your code has been pushed to GitHub.
We did this so that we can later tell Heroku to refer to this GitHub repository for code.
Setup Heroku
Go to https://signup.heroku.com and create a free account, If you already have an account then log in and go to the dashboard.
After login is successful, go to https://dashboard.heroku.com/apps
you will see list of apps created on this account. Click on "New -> Create new app” button at the top right.
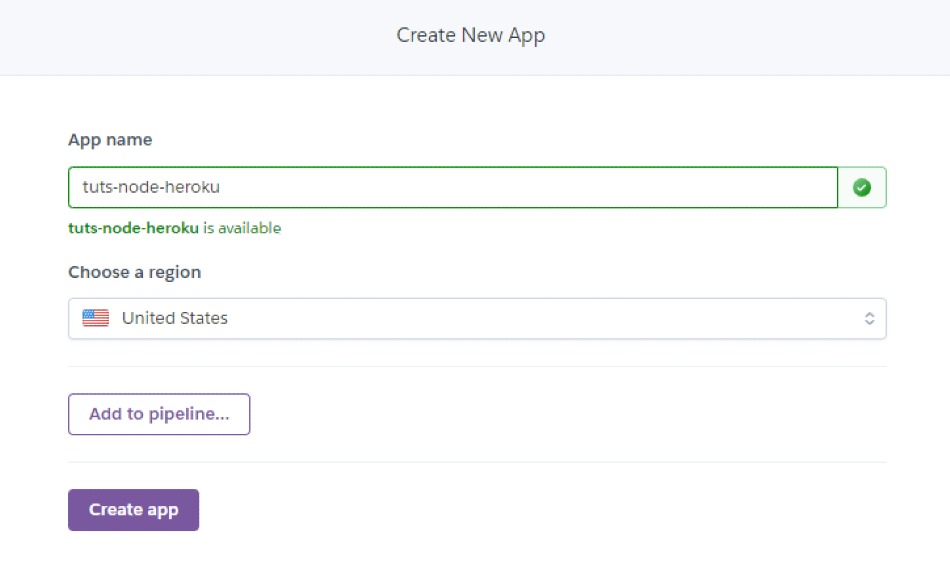
Then Give a name to your app and click “Create app”. Note that this needs to be a unique name.
Deployment using Heroku CLI
Install Heroku CLI on your machine you can install it from here, and verify the installation by running heroku --version .
Once the installation is done, go to your project and run the below command in the terminal.
heroku loginThis will redirect you to the browser and ask for Heroku login credentials.
Now initialize git repository inside your working directory and connect that to your Heroku app using the second command with your app name.
$ git init
$ heroku git:remote -a unique-app-name-to-be-entered
Now you can add and commit to the Heroku master branch using the following commands.
$ git add .
$ git commit -m "your commit message"
$ git push heroku master
Once you are done you will be able to see that the build and deployment are successful in the latest activity section of the Heroku app overview. Now you can click the app button on the top to view your node application.
Automatic deployment using Git
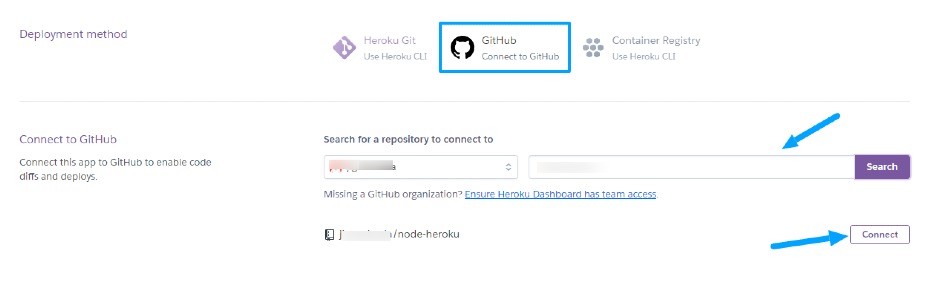
Go to your Heroku app and the “Deployment method” section and click on Github. Then Enter the repository name -> click search -> Select correct repository -> Click connect.
Click on the “Enable automatic deploys” button which would mean that whenever you add any code to your GitHub repository, Heroku will update your hosted app too.
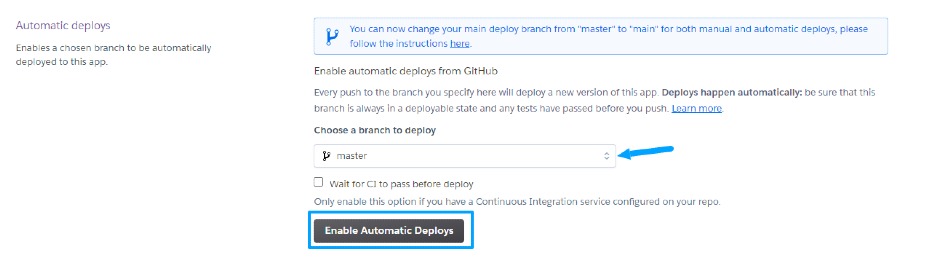
Now click on “Deploy branch ”. Wait for a few minutes and let the deploying process finish.
Once the process is finished, you can see your deployed project,
👍 Great! That’s all that is needed to host a Node.js app.
Also read, Top 10+ Heroku Alternatives For Free
If you have added some secrets like email, password, MongoDB Atlas URI, etc, then in the code, you shouldn’t directly paste it. Instead, put the following in the code and set its value in the Heroku “config vars” section.
Conclusion
We have successfully learned how to deploy a Node.js app and how to set config vars on Heroku.


Leave a Comment
Share Your Thoughts