In this post, we will learn how to create a new trail in AWS CloudTrail step by step and how it can be usefully while using AWS services.
What is CloudTrail?
CloudTrail is the service you use to monitor/Audit what the users in your AWS account are doing.
CloudTrail logs include details about any API calls made to your AWS services, including the Console.
It generates encrypted log files and store them in AWS s3.
CloudTrail is enabled by default when an account is created, which is also called as Default trail.
The Default Cloud Trail kept the information for 90 days.
Read : What is Cloud Computing? A Beginner's Guide
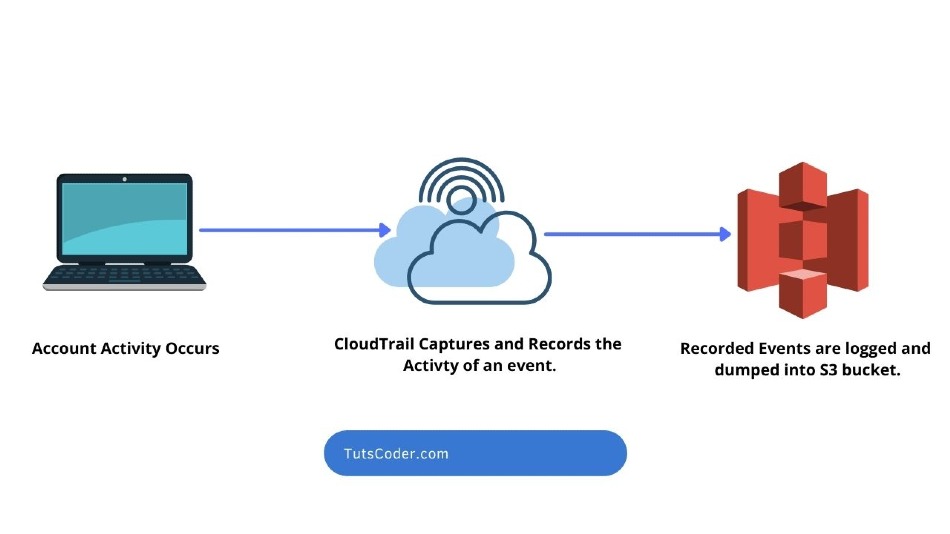
How CloudTrail Works?
Suppose you made any activity like you delete any table from DynamoDB or do any activity, CloudTrail will captures these activities and record them as event and these recorded events are then logged and dumped into s3 bucket.
In Other Words,Action taken by a user,role or an AWS service are recorded as events in CloudTrail.
Events include action taken in the AWS Management Console,AWS Command line interface, AWS SDKs and APIs.
Which Type Of Information are stored in CloudTrail Logs?
In CloudTrail recorded infomration includes:
- Infomation of the API caller
- During which time the API is called
- IP address of the API caller
- Requests Parameters of API
- Response retuned by AWS services
Read : Different Types of Cloud Service Models and their uses
How To Create A New Trail In AWS CloudTrail:
1. Go to AWS services and select Management & Governance > CloudTrail > Dashboard.
When you open Dashboard you will see some entries in Default CloudTrail.
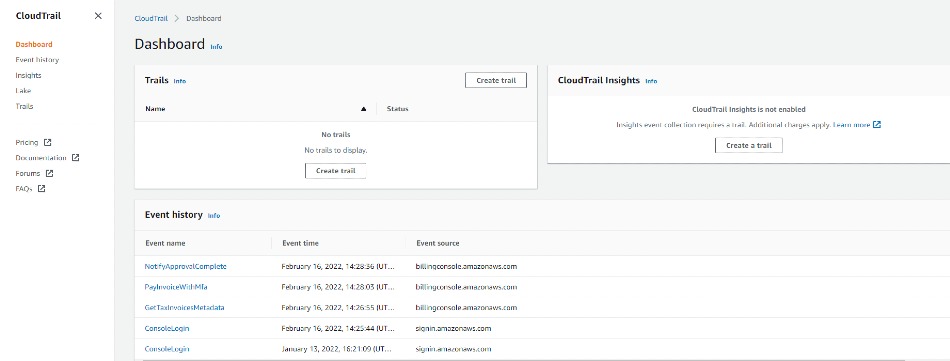
As we know, the Default Cloud Trail kept logs for only 90 days, so if we want to increase it we need to create an CloudTrail, so let's create a new one by Clicking on Create Trail button.

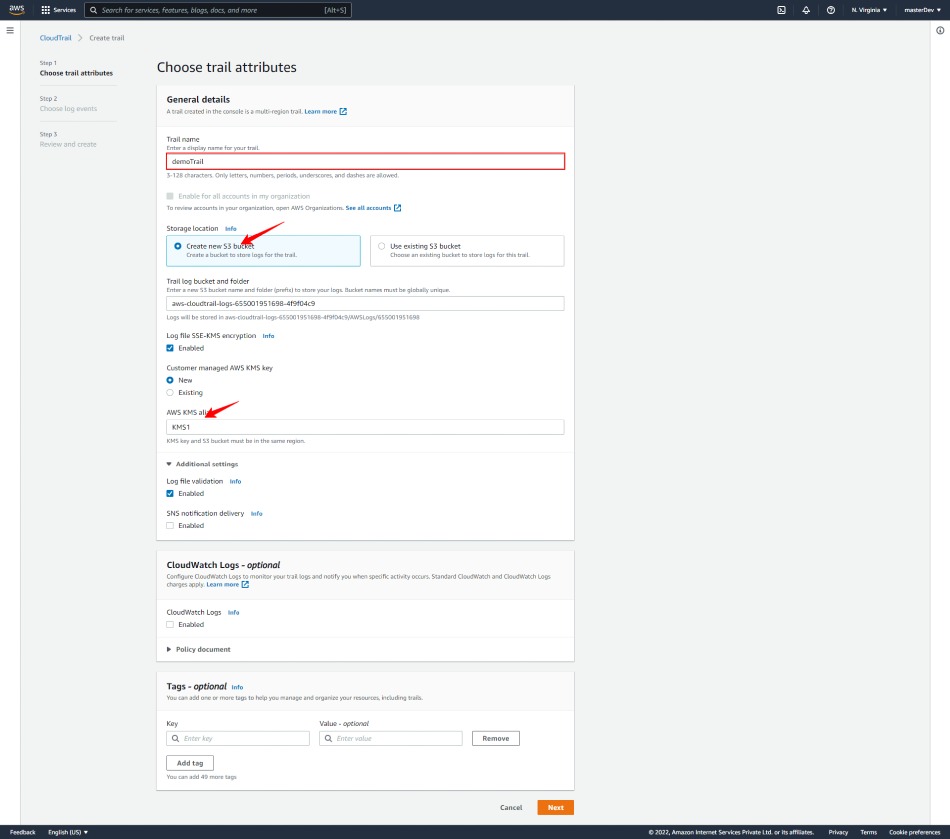
2.Now Give your Trail name and fill the details as shown below:
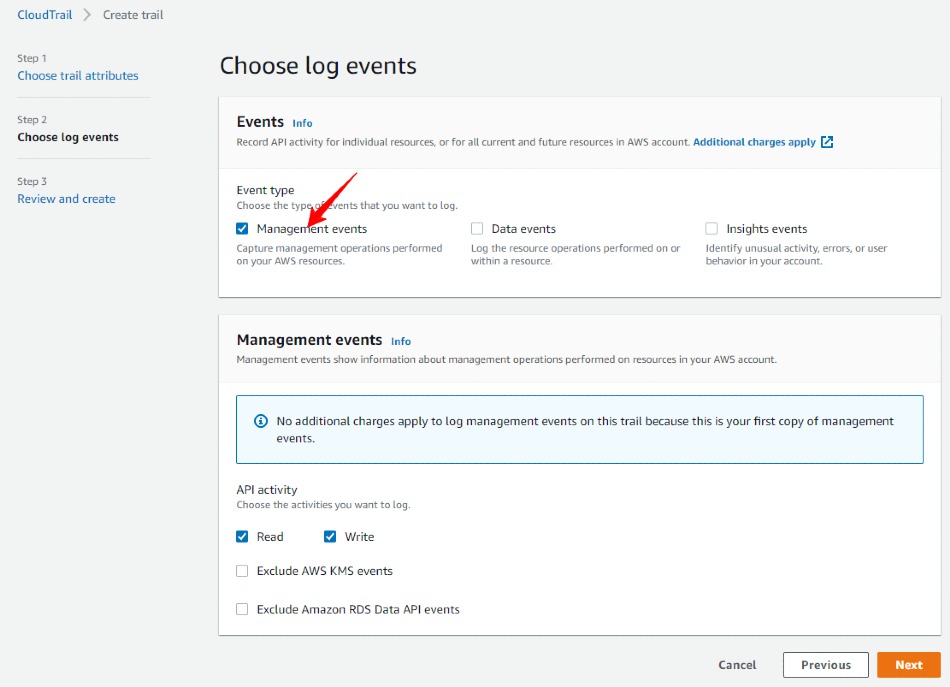
3.Here you can chose which type of log events you want to record, but we request to select Management Events because its free and can be viewed upto 90 days and for other events you have to pay charge.
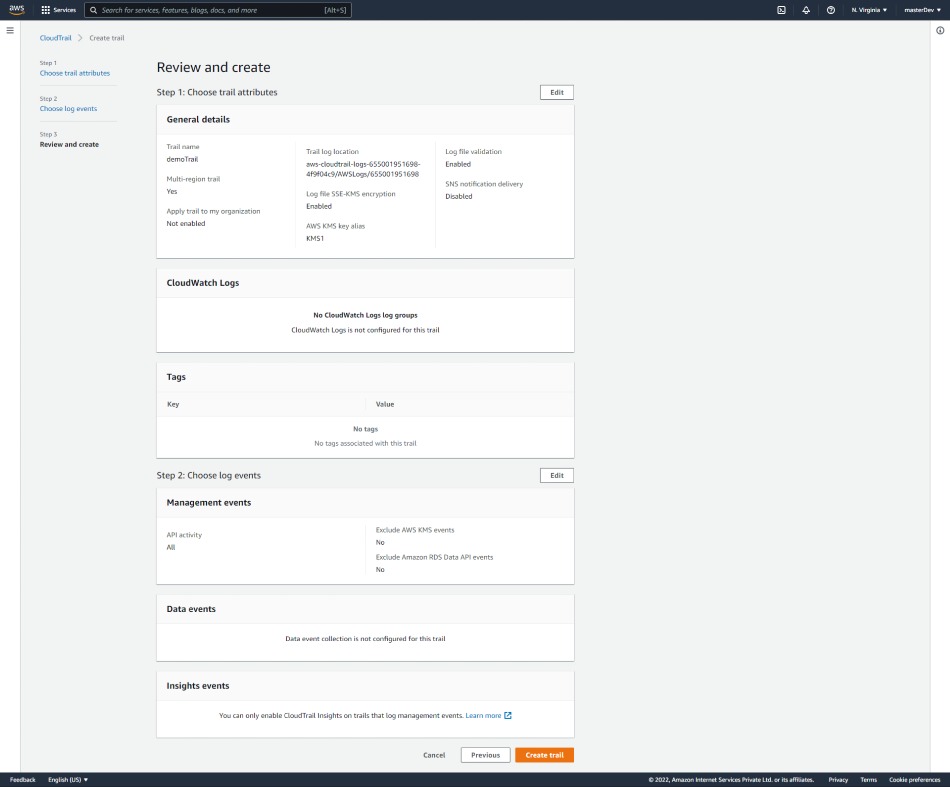
4.Verify your cloud trail summary and click on Create Trail.
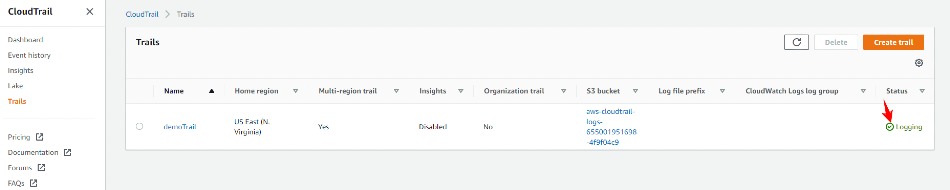
5.Your new Cloud Trail is now created and you can see logging status.
Limitation of CloudTrail:
There are also some limitation CloudTrail has:
1.Trails limited to 5 per region:
2.2 Transaction per second
3.Event Selectors limited to 5 per trail
4.Event size is limited to 256kb
Conclusion:
Thanks for reading, hope you find this cloudTrail guide useful.


Leave a Comment
Share Your Thoughts