
In this tutorial, we are going to set up a browser push notifications for the WordPress site using oneSignal service for free.
so, let’s get started…
What is Push Notification?
Push notifications are messages that come from a website, You get them on your desktop or device even when the concerned web page is not open in your browser.
Setting up Web Push Notifications in WordPress with OneSignal
OneSignal is a free service that allows you to add push notifications to any website, web, or mobile apps.
To setup the OneSignal push notification in WordPress, you have to add related API keys and Application IDs into the plugin settings.
So, Let’s get started.
Step-1: Create Account
Go to OneSignal and create a free account.
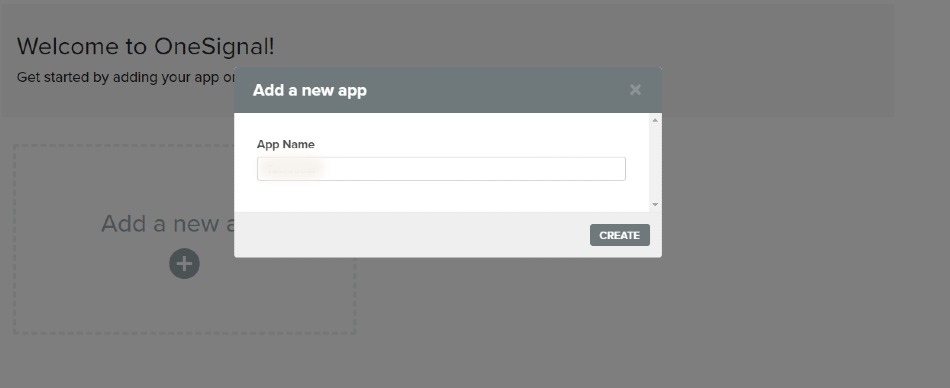
Step-2: Add New App
Click on “Add a new app” and enter your app name. In our example, we are simply using the name of our WordPress site. Then click on “Create.”
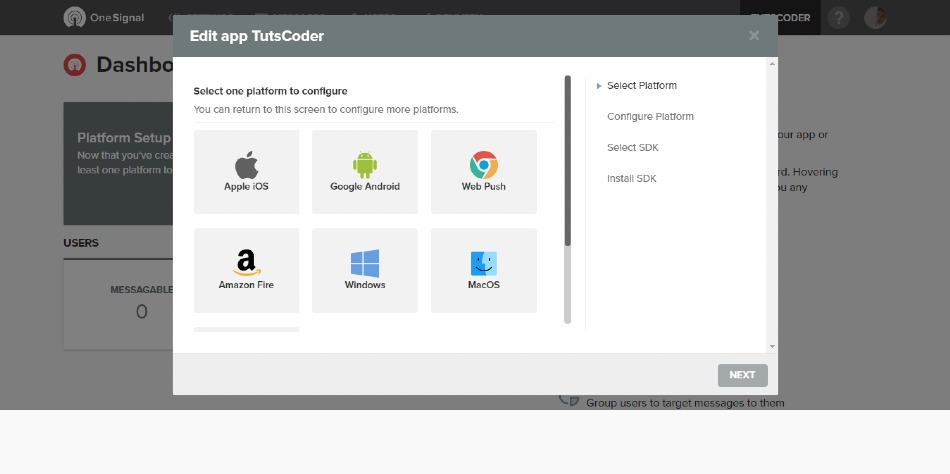
Step-3:Setup web push
Select “Web Push” and click “Next.”
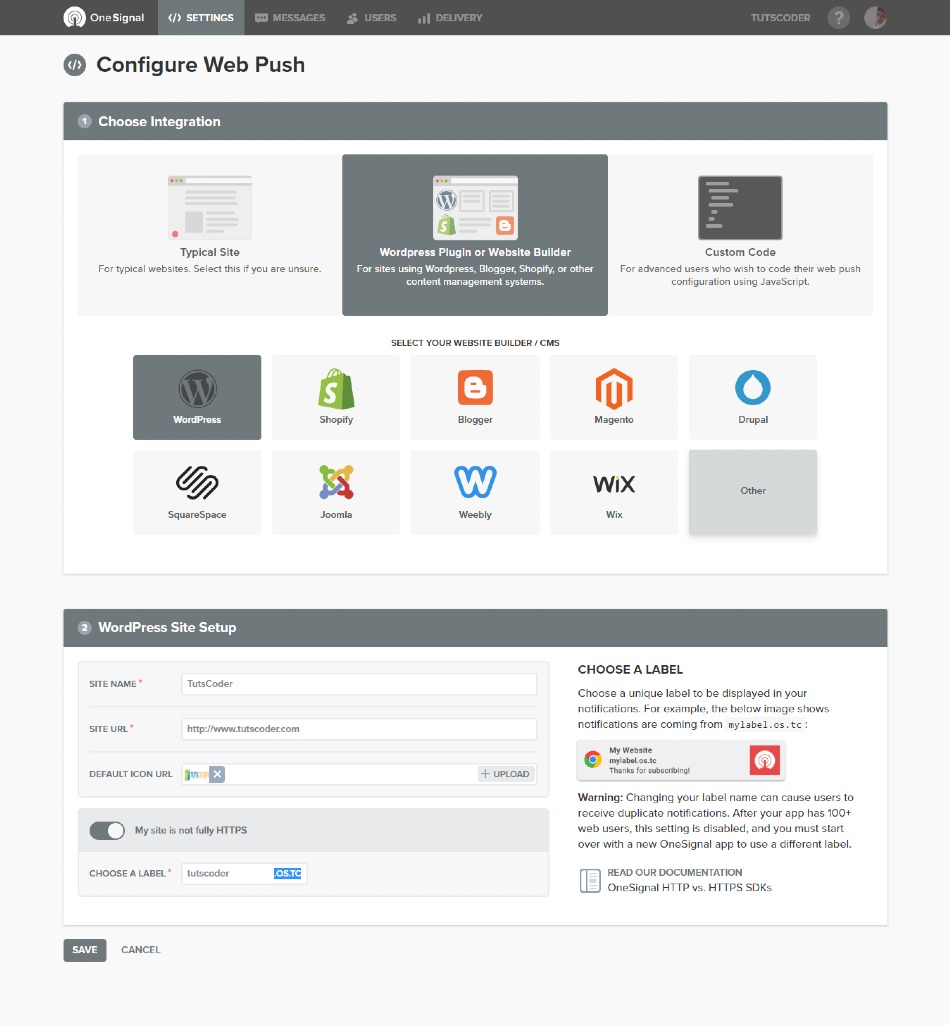
Step-4:Configure Web Push
On the next screen, you will need to select your target SDK, so we will select “WordPress” then scroll to the bottom and in the WordPress site setup section enter your WordPress Site Name and Site URL.
According to OneSignal, icon dimensions should be 192 x 192 or larger to display well on high pixel density devices. The default OneSignal notification icon will be used if you don’t choose one. Then click “Save.”
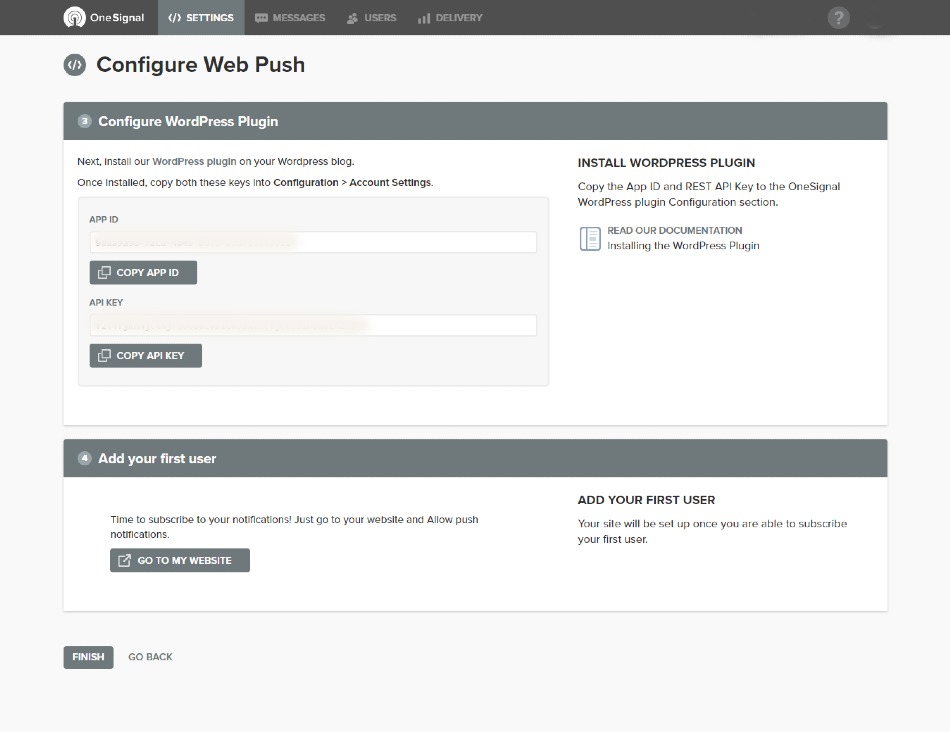
Step-7:Get API Keys
Now you will able to see your API Key and App ID on next screen On the next screen, copy your Rest API key and App ID as you will need to input this information into the settings of the WordPress plugin.
Step-8:Wordpress Plugin install
Now Go to your WordPress site then Download and install the free OneSignal plugin.
You can download it from the WordPress official site or by searching it within your WordPress dashboard under the “Add New” plugins menu
Also read,
- How to Install or Upgrade Wordpress Plugins Manually
- Top 10 Best Wordpress Plugins Must Have for Every Blog
Step-9:Configure plugin
After the install is done, click on the “Configuration” tab of the OneSignal Push settings. Enter your App ID and API Key which you have got from OneSignal and click “Save.”
Step-10:Notification subscription testing
You will then want to browse your website and subscribe to the notification to test that everything is working correctly. Click on the “red bell” symbol on the bottom right and click on “Allow.”
You will see a confirmation and click on “Allow”.
Automate push notification on post publish
By default When you install the OneSignal WordPress plugin, it enables the option to “send notification on post publish” automatically. If You don’t want to get pushed then easily un-check the option in add post section WordPress.
Customization
You can also click on the Options, Segment, Schedule/Send Later to further customize your web push notification.
Conclusion
Thanks for reading.
That’s it from now you are ready with push notification implemented on your WordPress site, We hope this article helped you add web push notification your WordPress site.
Do let me know If you face any difficulties please feel free to comment below we love to help you.if you have any feedback suggestion then please inform us by commenting.
Don’t forget to share this tutorial with your friends on facebook, twitter and Google+.


Leave a Comment
Share Your Thoughts